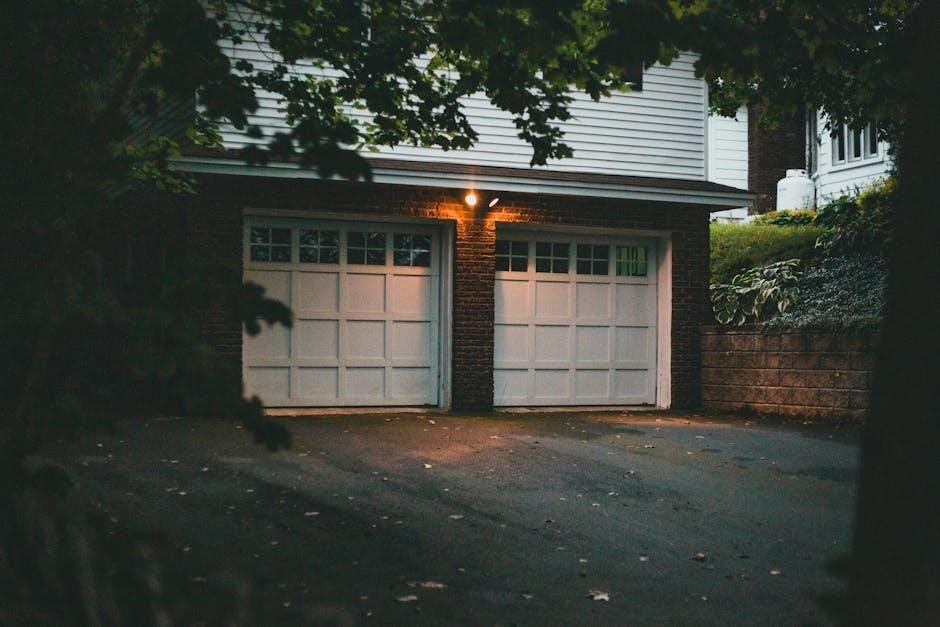
This comprehensive guide simplifies programming your Craftsman garage door remote. Follow step-by-step instructions for various opener models, ensuring secure and seamless access to your garage, enhancing daily convenience and safety.
Why Program Your Craftsman Remote?
Programming your Craftsman garage door remote is crucial for several practical reasons, significantly enhancing convenience and security for your home. Craftsman garage door openers are designed to be user-friendly, allowing for easy programming of multiple remotes, ensuring every household member or vehicle has dedicated access. This process is essential when acquiring a new remote, replacing a lost or malfunctioning one, or simply adding additional access points. Many Craftsman remotes, with their two-button design, offer distinct functions for opening and closing, simplifying daily operation. Furthermore, programming enables advanced features like controlling multiple garage doors with a single remote, or utilizing rolling code technology for enhanced security, transmitting a new code with every press; Properly programmed remotes ensure smooth operation, secure entry, and facilitate integration with modern car-based systems. It empowers you to manage access effortlessly, making your garage system both efficient and safe.
Understanding Craftsman Remote Types
Understanding the various types of Craftsman remotes is fundamental before beginning the programming process. Historically, many older Sears Craftsman units utilized DIP switch technology. These remotes feature a series of small switches that must be matched precisely to the settings on your garage door opener. Some older multi-button DIP switch remotes even had the first switch hard-coded to a specific button, allowing control of multiple openers from a single remote.
More modern Craftsman openers, often operating at a 315MHz frequency, employ rolling code technology, sometimes referred to as Security+. These remotes transmit a new, unique security code with every press, offering enhanced protection against code grabbing. They are typically programmed using a ‘LEARN’ button located on the opener unit itself. You might also encounter single-button, two-button, or three-button remotes, some with distinctive black buttons indicating Security+ features. Always consult your opener’s manual to determine the specific remote type compatible with your model, ensuring a successful setup. Universal remotes also exist for broader compatibility.

Essential Preparations Before Programming
Before programming, gather your compatible Craftsman remote, fresh batteries, and locate your garage door opener model information. These essential preparations ensure a smooth, frustration-free setup process for secure access.
Gathering Your Materials
Before embarking on the programming process for your Craftsman garage door remote, a crucial initial step is to gather all necessary materials. First and foremost, ensure you have the specific Craftsman remote control you intend to program readily available. It’s vital to confirm its compatibility with your existing garage door opener model; consult your owner’s manual if unsure, as some openers require a particular type of remote or keypad. Next, have your garage door opener unit accessible, or at least its model number and any relevant documentation like the owner’s manual. This will be invaluable for identifying the correct programming method. A fresh set of batteries for your remote is absolutely essential. Dead or low batteries are a frequent cause of programming frustrations and can lead to unnecessary troubleshooting. Having new batteries ensures optimal performance and a successful programming attempt. Lastly, consider any additional remotes or keypads you might want to program, ensuring they are also compatible and on hand before you begin.
Checking Remote Battery Life
Ensuring your Craftsman remote has fresh batteries is a critical preliminary step before attempting any programming. Many common programming frustrations stem directly from dead or weak batteries, leading to unnecessary headaches and wasted time. Your remote relies on adequate power to transmit the correct signals to your garage door opener. If the battery is low, the remote might not respond consistently, or it may fail to program altogether, even if all other steps are followed correctly. Therefore, before you begin, always replace the existing batteries in your Craftsman remote with new ones. This simple action ensures that your remote operates at its full potential, providing a strong and reliable signal during the programming sequence. Having new batteries on hand guarantees proper functionality and significantly increases the likelihood of a successful and smooth programming experience, allowing you to avoid troubleshooting issues related to power supply.
Locating Your Opener Model Information
Locating your Craftsman garage door opener’s model information is a crucial preparatory step before programming. This information is vital for determining the correct programming method, as different opener models may require specific procedures, whether it involves a LEARN button, DIP switches, or other unique steps. Often, the model number and sometimes the serial number can be found on a label affixed to the motor unit itself, typically on the rear control panel or side casing. Additionally, consulting your owner’s manual is highly recommended, as it will explicitly outline the correct device compatibility and programming instructions tailored to your specific unit. Knowing your opener’s model helps ensure you’re using a compatible remote or keypad. If your opener is particularly ancient, some models might not even have a remote feature, potentially requiring a manual wiring solution rather than remote programming. Identifying this information early prevents compatibility issues and streamlines the entire programming process for your Craftsman system.

Programming with the LEARN Button
The LEARN button method is central for programming Craftsman remotes. Find it on your opener’s motor unit. Pressing it starts a brief window, allowing you to sync your remote for secure access.
Finding the LEARN Button on Your Opener
Locating the LEARN button is the crucial first step for programming your Craftsman garage door remote. Typically, this vital button is found on the rear control panel or the motor unit of your garage door opener. Its exact position can vary slightly depending on your specific Craftsman model and its manufacturing year. Often, the button is distinctly colored, commonly red, orange, purple, or green, making it easier to identify amongst other components. Sometimes, it might be hidden under a light cover or a protective plastic flap. For older models, it could be less prominent, requiring a closer look. If you struggle to locate it, consulting your Craftsman owner’s manual is highly recommended; it provides an exact diagram and description of your unit’s features. Once you’ve identified this button, you’re ready to proceed with the programming sequence. It’s designed for user-friendly access, allowing quick syncing of new remotes or keypads. Remember, this button initiates the pairing process between your opener and its control devices, so accurate identification is key to successful setup. Ensure you have proper lighting and perhaps a step ladder for easier access to the motor unit for this task.
Step-by-Step LEARN Button Programming

To program your Craftsman garage door remote using the LEARN button, begin by locating this crucial button on the rear control panel or the motor unit of your opener. Often, it’s a distinctly colored button (red, orange, purple, or green). Once found, press and immediately release the LEARN button; The opener’s courtesy light will illuminate, sometimes accompanied by an audible click, signifying that the unit has entered programming mode. This mode remains active for approximately 30 seconds, providing a window to sync your remote. While the light is illuminated, take your Craftsman remote control and press the desired button you intend to use for operating the garage door. Hold this remote button down until the opener’s courtesy light blinks or goes out. This visual cue indicates that the programming is complete and successful. For rolling code remotes, the process is similar: press the Learn button, then hold the desired remote button until the indicator light blinks. Finally, test your remote to ensure it properly activates your garage door opener.
Programming Rolling Code Remotes
Craftsman garage door openers utilizing rolling code technology offer enhanced security by transmitting a new, unique code each time the remote is pressed, thwarting code interception. Programming these remotes is straightforward. First, locate the “LEARN” button on your garage door opener’s motor unit. This button is typically found on the back or side panel and may be colored red, orange, purple, or green. Press and quickly release this LEARN button. The indicator light on the motor unit will illuminate, signifying that the opener is now in programming mode and ready to accept a new remote code. Immediately after, within approximately 30 seconds, pick up your Craftsman rolling code remote and press and hold the specific button you wish to program for your garage door. Continue holding the button until the indicator light on the motor unit blinks rapidly or turns off, confirming that the new rolling code has been successfully learned. Test the remote to ensure proper operation.

Programming with DIP Switches
For older Craftsman openers, programming involves internal DIP switches. Align these tiny switches on your remote to precisely match the opener’s settings. This ensures proper function and secure garage access.
Identifying DIP Switch Remotes

DIP switch remotes are typically found with older Craftsman garage door opener models. To identify if your remote utilizes these specific switches, you will usually need to open the battery compartment or a small cover on the remote itself. Inside, you will see a series of small, numbered switches, often eight or nine in total, which can be toggled to an ‘on’ or ‘off’ (or ‘+’, ‘0’, ‘-‘) position. These distinct switches determine the unique code the remote transmits. It’s crucial to recognize this type of remote as its programming method differs significantly from newer “LEARN” button systems. The distinct arrangement of these physical switches is the primary indicator. Some older Sears Craftsman remotes, particularly multi-button units, might have their first dip switch hard-coded to a specific button, enabling control of multiple openers from one set of dip switch settings. Always inspect your remote’s interior carefully to confirm the presence of these switches before proceeding with programming.
Matching DIP Switch Settings
To successfully program your Craftsman garage door remote using DIP switches, the critical step is to ensure that the switch settings on your new remote exactly match those on your existing, working remote or, more commonly, directly on the garage door opener unit itself. First, locate the DIP switches on both devices. On the opener, these are typically found near the antenna wire or under a light cover. On the remote, they’re usually inside the battery compartment. You’ll see a series of small switches, often numbered, that can be set to ‘on’ or ‘off’ positions (or ‘+’, ‘0’, ‘-‘). Carefully observe the pattern on your opener or working remote. Then, using a small screwdriver or pen, meticulously adjust each switch on your new remote to replicate this exact sequence. For older Sears Craftsman remotes, remember that the first dip switch might be hard-coded to a specific button, which helps control multiple openers, so ensure this unique aspect is accounted for during the matching process. Precision is key for the remote to communicate correctly with the opener.
Programming Multiple Openers with DIP Switches
To program a single Craftsman remote to operate multiple garage door openers, particularly older models utilizing DIP switches, a specific understanding of their functionality is required. The key lies in how the remote’s buttons interact with the DIP switch settings. For older Sears Craftsman remotes, the first DIP switch is often hard-coded to be dependent on which button you press on the remote. This ingenious design allowed users to control multiple garage door openers with just one set of DIP switches on a single remote. To implement this, first, identify the DIP switch settings for each individual garage door opener you wish to control. Then, program your multi-button remote. For each button you intend to use for a different opener, you might need to adjust the remote’s internal DIP switches, or more commonly, understand that the remote’s internal logic modifies the signal based on the button pressed. This enables a single remote to send different signals for different doors, effectively controlling multiple units from one device, simplifying access without needing a separate remote for each opener.
Integrating Car-Based Systems (HomeLink)
Modern cars feature built-in garage door controls like HomeLink. Syncing your vehicle with your Craftsman opener offers convenience. Prepare by positioning your car near the garage with the engine running.
Preparing Your Vehicle for Syncing
Before attempting to integrate your car’s built-in garage door system, such as HomeLink, with your Craftsman opener, a few crucial preparation steps are necessary to ensure a smooth and successful syncing process. First, ensure your vehicle is parked in or very near your garage. Proximity is key for the car’s transmitter to communicate effectively with the garage door opener’s receiver. It’s often recommended to have the car’s engine running during the programming sequence; this ensures a stable power supply to the vehicle’s electrical system, preventing any power interruptions that could disrupt the syncing. Gather your original Craftsman garage door remote control, as it will likely be needed to “teach” your car’s system the correct code. Make sure this remote has fresh batteries to avoid any programming frustrations due to a weak signal. Finally, consult your vehicle’s owner’s manual for specific instructions regarding its integrated garage door opener system, as procedures can vary slightly between car manufacturers and models, ensuring you’re ready for the next steps.
Syncing Your Car with the Opener
Once your vehicle is properly prepared, syncing its built-in system, such as HomeLink, with your Craftsman garage door opener involves a few key steps. Begin by clearing any pre-existing programming in your car’s HomeLink buttons, typically by holding down the two outer HomeLink buttons until the indicator light flashes rapidly. Next, position your original Craftsman remote control a few inches from the HomeLink button you wish to program. Simultaneously press and hold both the desired HomeLink button and the button on your Craftsman remote that opens the garage door. Hold them until the HomeLink indicator light changes from a slow to a rapid flash. Then, proceed to your Craftsman garage door opener motor unit and locate its “LEARN” button. Press this button firmly and quickly release it. Within 30 seconds, return to your vehicle and press the recently programmed HomeLink button twice, or until the garage door activates. This finalizes the syncing process, allowing your car to control your Craftsman opener.

Programming Craftsman Wireless Keypads
To program your Craftsman wireless keypad, follow instructions on the motor unit. Easily change the password anytime, ensuring secure access without a remote, perfect for family or guests.
Benefits of a Wireless Keypad
Wireless keypads offer significant benefits for your Craftsman garage door opener, enhancing both overall convenience and security. They eliminate the need for a physical remote, providing reliable access even if your clicker is lost, forgotten, or unavailable. This feature is perfect for kids coming home from school, allowing them independent, safe entry without a remote, granting parents great peace of mind. Keypads are also ideal for granting temporary access to service personnel, trusted neighbors, or friends without distributing a physical device, offering excellent flexibility. You can easily manage who enters your garage by simply sharing a unique code. The ability to change this password whenever needed, directly from the motor unit, ensures superior control over your garage’s security. Proper installation, within sight of the door and out of children’s reach (minimum 5 feet high), maximizes safety and usability. This makes a wireless keypad an incredibly versatile and practical addition.
Keypad Programming Steps
To program your Craftsman wireless keypad, locate the “LEARN” button on your garage door opener’s rear control panel. Press and release it promptly. The opener’s courtesy light will illuminate, often with an audible click, signaling programming mode. Within 30 seconds, enter your chosen personal identification number (PIN) on the keypad. Then, press and hold the “ENTER” button. Maintain hold until the garage door opener lights flash or a distinct click confirms successful pairing. Test the keypad to ensure it operates the door correctly. Instructions for changing your keypad’s password are usually found on the motor unit, allowing easy security updates whenever needed.

Troubleshooting Remote Programming

Facing issues? A bad receiver or an ancient opener without remote capability might be the problem. Check compatibility to avoid common programming frustrations and ensure success.
Common Programming Frustrations
Many users encounter specific hurdles when programming their Craftsman garage door remotes, turning what should be a simple process into a headache. A frequent culprit is often overlooked: dead or low batteries in the remote itself. New batteries are crucial for proper function, preventing unnecessary frustration during the setup. Another common issue arises when attempting to program a new single-button remote using an older multi-button unit, requiring careful attention to specific programming adjustments. Users might also struggle with locating the LEARN button or executing the timing correctly, leading to failed attempts. Incorrect DIP switch settings, if applicable to your remote type, can also prevent successful syncing. Sometimes, the opener unit simply won’t respond, suggesting a potential problem with the receiver. Ensuring you have the correct remote type compatible with your specific Craftsman opener model is paramount, as incompatibility can be a significant source of frustration, making programming impossible despite following all steps meticulously.
When Your Opener Lacks a Remote Feature
For some older Craftsman garage door openers, a fundamental issue can arise: the unit may simply lack a built-in remote feature. If your opener is particularly ancient, it might not have been designed with remote control capabilities, rendering programming efforts futile. These models often predate the widespread integration of wireless remote technology, meaning there’s no “learn” button or internal receiver to connect with a modern remote. In such scenarios, attempting to program any remote, even a compatible one, will be unsuccessful. You might find that these very old units require manually wiring to an external remote opener kit as a workaround, if such a modification is even possible. However, a more practical solution, especially given that the average lifespan of a motor is about 15 years before common problems emerge, is often to consider upgrading the entire garage door opener. A new unit will guarantee modern remote functionality and enhanced reliability.
Ensuring Remote Compatibility
Before attempting any programming, verifying your remote’s compatibility with your Craftsman garage door opener is absolutely crucial. Many common programming frustrations stem directly from using an incompatible device. Since Chamberlain, Liftmaster, and Craftsman openers are often manufactured by Chamberlain, there’s a good chance of cross-compatibility among them. However, it’s not universally guaranteed for all models. Always check your owner’s manual to determine the specific type of remote or keypad required for your particular opener. Look for model numbers or frequency information, such as “315” printed on the remote control itself, which indicates a particular security protocol and frequency. Some remotes are designed with specific features, like transmitting a new security code every time the button is pushed, or having distinct button colors (e.g., black buttons) that signify compatibility. Using the correct device, as specified in your opener’s documentation, is the essential first step towards successful programming and avoids unnecessary troubleshooting.