
Welcome to the Honeywell T6 Pro Installation Manual, your comprehensive guide for installing, configuring, and maintaining the T6 Pro Smart Thermostat. This manual provides step-by-step instructions, troubleshooting tips, and essential information to ensure optimal performance and energy efficiency. Designed for both professionals and homeowners, it covers everything from initial setup to advanced features, helping you maximize the potential of your smart thermostat.
1.1 Overview of the Honeywell T6 Pro Thermostat
The Honeywell T6 Pro Thermostat is a smart, Wi-Fi-enabled device designed for precise temperature control and energy efficiency. It features a touchscreen interface, geofencing, and smart home integration. Compatible with Z-Wave systems, it learns your schedule and preferences to optimize heating and cooling. The thermostat works with various HVAC systems, including forced air and hydronics, ensuring versatility for different home setups. Its advanced features make it a reliable choice for modern smart home upgrades.
1.2 Importance of Proper Installation
Proper installation of the Honeywell T6 Pro Thermostat is crucial for ensuring safety, efficiency, and optimal performance. Incorrect wiring or setup can lead to electrical hazards, system damage, or poor temperature control. Following the manual’s guidelines helps prevent these issues, ensuring your HVAC system operates efficiently and safely. Proper installation also guarantees compatibility with your home’s infrastructure and maximizes the thermostat’s smart features for energy savings and comfort.

System Requirements and Compatibility
The Honeywell T6 Pro is compatible with most HVAC systems, requires standard electrical connections, and supports Z-Wave and Wi-Fi for smart home integration, ensuring optimal performance and seamless connectivity.
2.1 HVAC System Compatibility
The Honeywell T6 Pro is compatible with most HVAC systems, including forced air, hydronics, and conventional heating and cooling systems. It supports 2-stage heat pumps, gas, oil, and electric systems, ensuring versatile installation options. The thermostat is designed to work with both traditional and modern HVAC setups, providing precise temperature control and energy efficiency. Proper system compatibility ensures optimal performance and seamless integration with your home’s heating and cooling infrastructure.
2.2 Electrical Requirements
The Honeywell T6 Pro requires a 24V AC power supply, typically derived from your HVAC system’s transformer. It can be hardwired or powered using 2 AA batteries for backup. The C terminal is optional but recommended for continuous power, ensuring the thermostat remains functional during HVAC system outages. Proper electrical connections are crucial for reliable operation, energy efficiency, and advanced smart features. Always disconnect power before starting installation to avoid electrical hazards.
2.3 Z-Wave and Wi-Fi Compatibility
The Honeywell T6 Pro supports both Z-Wave and Wi-Fi connectivity, enabling seamless integration with smart home systems. It operates on dual-band Wi-Fi (2.4 GHz and 5 GHz) for reliable network connections. Z-Wave Plus technology ensures enhanced range and security for smart device control. The thermostat can be connected to the Honeywell Home app, allowing remote temperature adjustments and smart home automation. A stable internet connection is required for full Wi-Fi functionality and remote access.
Package Includes
The Honeywell T6 Pro package includes the thermostat unit, UWP mounting system, Honeywell standard installation adapter, decorative cover plate, screws, anchors, and 2 AA batteries.
3.1 T6 Pro Thermostat Unit
The T6 Pro Thermostat Unit is the core component, featuring a sleek touchscreen interface and advanced smart home capabilities. It includes Wi-Fi and Z-Wave compatibility for seamless integration with smart systems. The unit is designed for easy installation and offers intuitive temperature control, scheduling, and energy-saving features. Ensure the thermostat is compatible with your HVAC system before installation for optimal performance and functionality.
3.2 UWP Mounting System
The UWP Mounting System is a universal wall plate designed for easy installation of the T6 Pro Thermostat. It ensures compatibility with most standard electrical boxes and provides a secure, level surface for mounting. The system includes adjustable features to accommodate various wall types and sizes. Its sleek design blends seamlessly with home decor, offering a professional finish. Follow the manual’s instructions for proper installation to guarantee stability and functionality.
3.3 Honeywell Standard Installation Adapter
The Honeywell Standard Installation Adapter is included in the T6 Pro package to simplify installations, especially for systems without a J-box. It ensures a secure and reliable connection between the thermostat and your HVAC system. Designed for compatibility with various setups, the adapter provides a seamless mounting solution. Follow the manual’s guidelines for proper installation to guarantee optimal performance and avoid potential electrical issues.
3.4 Decorative Cover Plate
The decorative cover plate is an optional accessory included in the T6 Pro package. It is designed to cover any marks or holes on the wall from previous thermostat installations. Measuring 4-49/64 in x 4-49/64 in x 11/32 in, it provides a sleek, finished appearance. If not needed, the UWP mounting system can be used directly. This plate ensures a clean and professional-looking installation, enhancing the overall aesthetic of your thermostat setup.
3.5 Screws and Anchors
The package includes screws and anchors essential for securely mounting the T6 Pro Thermostat to the wall. These components ensure a stable and level installation, preventing any wobbling or unevenness. Made from durable materials, they are designed to hold the weight of the thermostat and any additional accessories like the decorative cover plate. Properly installing these screws and anchors is crucial for the thermostat’s functionality and longevity, ensuring a professional finish. Follow the manual for correct usage.
3.6 2 AA Batteries
The Honeywell T6 Pro Thermostat includes 2 AA batteries, ensuring continuous operation during power outages. These batteries provide backup power and maintain your programmed settings. While the C terminal is optional with batteries, it’s recommended for optimal performance. Proper installation of the batteries is crucial for the thermostat’s functionality. Always use high-quality batteries and follow the manual’s instructions for installation to ensure reliability and convenience.
Pre-Installation Steps
Before installing the Honeywell T6 Pro Thermostat, download the Honeywell Home app, review the manual, and verify all components are included in the package. This ensures a smooth installation process.
4.1 Downloading the Honeywell Home App
Download the Honeywell Home app from the App Store or Google Play. This app is essential for configuring the T6 Pro Thermostat and accessing advanced features. It allows you to set up the thermostat, invite users, and monitor energy usage. The app also includes a hidden PRO installation feature, enabling professionals to configure the thermostat and grant customer access seamlessly. Ensure the app is installed before starting the installation process for a smooth setup experience.
4.2 Familiarizing Yourself with the Manual
Before starting the installation, thoroughly read the Honeywell T6 Pro installation manual. It contains detailed diagrams, step-by-step instructions, and essential safety precautions. Familiarize yourself with the contents to ensure you understand the process and have all necessary tools and components. The manual also provides troubleshooting tips and specifications to help you avoid common mistakes and ensure a smooth installation process.
4.3 Checking the Package Contents
Verify that your Honeywell T6 Pro package includes the thermostat unit, UWP mounting system, Honeywell standard installation adapter, decorative cover plate, screws, anchors, and 2 AA batteries. Ensure all components are present and undamaged before proceeding with installation. This step helps prevent delays and ensures a smooth setup process. Refer to the manual for a detailed list of included items and their descriptions.

Installation Process
The installation process involves turning off power, removing the old thermostat, mounting the UWP system, wiring the T6 Pro, installing batteries, and performing final checks for safety and efficiency.
5.1 Turning Off Power to the HVAC System
Before starting the installation, ensure the HVAC system is powered off at the circuit breaker or fuse box. Verify the system is completely off by checking the thermostat and all connected components. This step is crucial to prevent electrical shock or damage during the installation process. Always prioritize safety when working with electrical systems.
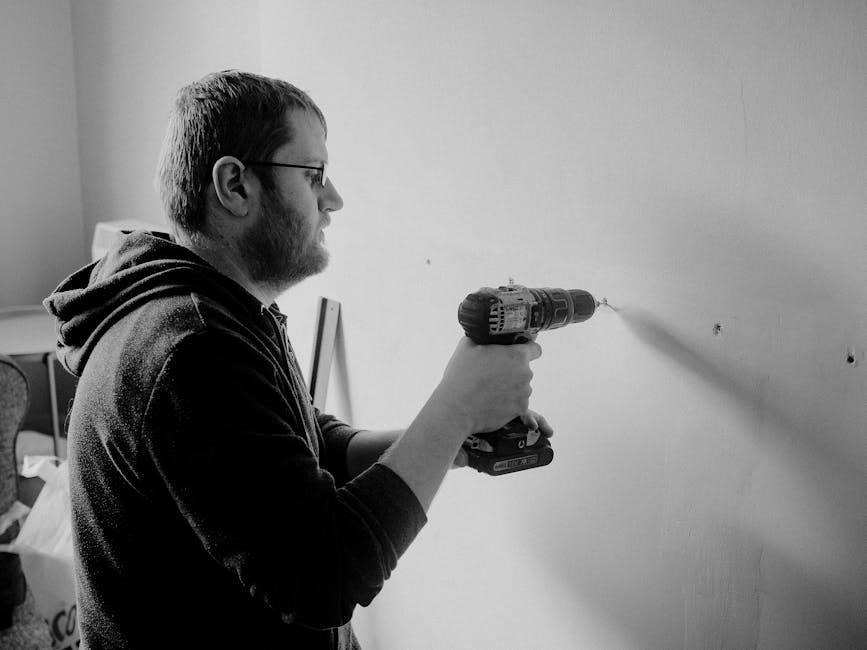
5.2 Removing the Old Thermostat
Start by disconnecting the power to the HVAC system. Next, remove the screws holding the old thermostat in place and gently pull it away from the wall. Carefully disconnect the wires from their terminals, taking note of their positions for later use. Once all wires are free, remove the old thermostat completely. Ensure the area is clear before proceeding with the new installation.
5.3 Mounting the UWP System
Locate the wall where the UWP Mounting System will be installed. Align the system with the wall studs for stability. Use the provided screws and anchors to secure the UWP system firmly. Ensure the system is level using the built-in level tool. Once mounted, the UWP system will serve as the base for the T6 Pro thermostat, providing a secure and stable installation surface.
5.4 Wiring the T6 Pro Thermostat
Connect the wires to the appropriate terminals on the T6 Pro thermostat, ensuring correct wiring for your HVAC system type. Use the terminal tabs to secure the wires firmly. The R (red) wire connects to the power terminal, while the C (common) wire is optional but recommended for continuous power. Refer to the manual for specific wiring configurations and compatibility with your system. Proper wiring ensures reliable operation and avoids potential damage.
5.5 Installing the Batteries
Insert two AA batteries into the thermostat’s battery compartment, ensuring correct polarity as indicated. The batteries provide backup power and are essential for maintaining settings during power outages. If using the C wire, batteries are optional but recommended for continuous operation. Secure the compartment cover tightly after installation to avoid any issues. Proper battery installation ensures uninterrupted functionality and optimal performance of your Honeywell T6 Pro thermostat.
5.6 Final Installation Checks
After completing the installation, restore power to the HVAC system and ensure the thermostat powers on. Verify the display is functional and all buttons respond correctly. Test heating and cooling modes to confirm proper operation. Use the Honeywell Home app to check Wi-Fi connectivity and ensure the thermostat is successfully connected. Perform a final system test to ensure all features work seamlessly. This step ensures your T6 Pro is installed correctly and ready for use.
Configuration and Setup
Use the Honeywell Home app to guide you through initial setup, Wi-Fi connection, and advanced feature configuration. Ensure a smooth and personalized smart thermostat experience.
6.1 Initial Thermostat Setup
Start by powering on the T6 Pro and following the on-screen prompts. Use the Honeywell Home app to guide you through initial setup, including Wi-Fi connection and location settings. Ensure the thermostat is properly paired with your HVAC system and configure basic preferences like temperature units and scheduling options. This step ensures seamless integration and personalized comfort from the beginning.
6.2 Connecting to Wi-Fi
To connect your T6 Pro to Wi-Fi, navigate to the network settings in the Honeywell Home app. Select your home Wi-Fi network from the list and enter the password when prompted. Ensure your router is nearby for a stable connection. If issues arise, restart your router or check your network name and password. A successful connection enables remote control and smart features through the app.
6.3 Using the Honeywell Home App
The Honeywell Home app allows you to configure and control your T6 Pro thermostat remotely. Use it to set schedules, adjust temperatures, and monitor energy usage. The app also features a hidden PRO installation mode, enabling professionals to invite customers to connect to the thermostat post-installation. Download the app from the App Store or Google Play to unlock these features and optimize your smart home experience.

Advanced Features
The Honeywell T6 Pro offers advanced features like scheduling, geofencing, and smart home integration, optimizing comfort and energy savings. Its learning capabilities adapt to your preferences, ensuring efficient temperature control and seamless smart home connectivity for enhanced convenience.
7.1 Scheduling and Geofencing
The Honeywell T6 Pro allows you to create custom heating and cooling schedules, optimizing comfort and energy use. Geofencing technology uses your location to automatically adjust temperatures when you leave or arrive home. The thermostat learns your schedule and preferences, ensuring efficient operation. This feature integrates seamlessly with the Honeywell Home app, enabling remote adjustments and maximizing energy savings. It’s a smart way to balance convenience and efficiency.
7.2 Smart Home Integration
The Honeywell T6 Pro seamlessly integrates with popular smart home systems like Amazon Alexa and Google Home, enabling voice control and centralized management. It also supports Z-Wave and Wi-Fi connectivity, allowing it to work with other smart devices in your home. This integration enhances convenience, enabling you to control your thermostat alongside other smart devices for a unified and efficient smart home experience.
7.3 Energy Savings Features
The Honeywell T6 Pro offers advanced energy-saving features, including geofencing and smart scheduling, which optimize heating and cooling based on your location and daily routines. The thermostat learns your preferences over time, adjusting temperatures to reduce energy waste. Additionally, it provides detailed energy usage reports, helping you identify areas for further savings and promoting eco-friendly habits.
Troubleshooting Common Issues
Address common issues like no power, incorrect temperature readings, or Wi-Fi connectivity problems. Check power sources, wiring connections, and network settings. Resetting the thermostat or updating software often resolves these issues quickly.
8.1 No Power to the Thermostat
If the thermostat has no power, first check the circuit breaker or fuse box to ensure power is not interrupted. Verify that the HVAC system’s power switch is in the “on” position. Ensure all wiring connections are secure and correct. If using batteries, check that they are installed properly and not depleted. Refer to the manual for detailed troubleshooting steps to restore power and functionality.
8.2 Incorrect Temperature Readings
If the thermostat displays incorrect temperature readings, ensure it is mounted away from direct sunlight, drafts, or heat sources. Check for proper calibration by navigating to the settings menu in the Honeywell Home app. Verify that the sensor is clean and free from obstructions. If issues persist, restart the thermostat or perform a factory reset as outlined in the manual. Accurate readings are essential for optimal HVAC performance.
8.3 Wi-Fi Connectivity Problems
If the T6 Pro thermostat loses Wi-Fi connectivity, restart the device and ensure your router is functioning properly. Verify that the thermostat is connected to the correct network and that the signal strength is adequate. Check for any software updates in the Honeywell Home app. If issues persist, reset the thermostat to factory settings or consult the manual for advanced troubleshooting steps to restore connectivity.
Maintenance and Care
Regularly clean the thermostat to prevent dust buildup. Replace batteries every 12-18 months and update software for optimal performance. Refer to the manual for detailed care instructions.
9.1 Cleaning the Thermostat
To maintain optimal performance, clean the Honeywell T6 Pro thermostat regularly. Turn off power to the system before cleaning. Use a soft, dry cloth to wipe the exterior and screen. For the interior, gently brush away dust with a soft-bristle brush or use compressed air. Avoid harsh chemicals or liquids, as they may damage the device. Ensure the thermostat is dry before restoring power to prevent electrical issues.
9.2 Replacing Batteries
To replace the batteries in your Honeywell T6 Pro thermostat, first ensure the system power is turned off. Open the battery compartment located on the front panel. Remove the old batteries and insert two new AA alkaline batteries, matching the polarity indicated. Close the compartment securely. This ensures continuous operation and prevents data loss. Replace batteries annually or when the low-battery indicator appears on the display.
9.3 Updating Software
Regular software updates ensure your Honeywell T6 Pro thermostat performs optimally and remains secure. To update, connect the thermostat to Wi-Fi and open the Honeywell Home app. Navigate to the settings menu, select “Device Update,” and follow prompts to download and install the latest software. Enable auto-updates for convenience. Always restart the thermostat after an update to apply changes. This keeps your system up-to-date with the latest features and improvements.
Performance Optimization
Performance optimization is a key feature of the Honeywell T6 Pro, leveraging its learning capabilities to adapt to your schedule and preferences for enhanced efficiency and energy usage monitoring to refine settings for optimal comfort and energy savings.
10.1 Learning Capabilities of the T6 Pro
The Honeywell T6 Pro features advanced learning capabilities that adapt to your home’s temperature needs. It learns how long your system takes to reach desired temperatures, adjusting operation times to ensure comfort. This smart feature optimizes heating and cooling cycles, reducing energy waste and improving efficiency. Over time, it personalizes your schedule, making your home smarter and more energy-efficient without manual adjustments.
10.2 Adjusting Temperature Settings
The Honeywell T6 Pro allows precise temperature adjustments through its intuitive touchscreen or the Honeywell Home app. Users can set schedules, adjust comfort levels, and enable geofencing for automatic changes. Energy-saving features like Smart Home Integration and energy usage monitoring help optimize settings. Adjustments can be made manually or programmed for convenience, ensuring your home remains comfortable while minimizing energy consumption. This flexibility enhances both comfort and efficiency seamlessly.
10.3 Energy Usage Monitoring
The Honeywell T6 Pro offers advanced energy usage monitoring, allowing users to track their consumption patterns through the Honeywell Home app. This feature provides detailed insights into energy use, helping identify trends and opportunities for savings. Historical data and personalized recommendations enable users to optimize their settings for greater efficiency. By monitoring energy usage, homeowners can make informed decisions to reduce waste and lower utility bills while maintaining comfort.
Warranty and Support
Honeywell offers a comprehensive warranty and dedicated customer support for the T6 Pro. The product is backed by a 5-year limited warranty, ensuring reliability and performance. Customers can access online resources, troubleshooting guides, and direct support through Honeywell’s official website or the Honeywell Home app, providing assistance whenever needed.
11.1 Honeywell Warranty Information
The Honeywell T6 Pro is backed by a 5-year limited warranty, covering defects in materials and workmanship. Registration is required to activate the warranty, ensuring protection for repairs or replacements. This warranty demonstrates Honeywell’s commitment to quality and customer satisfaction, providing peace of mind for users. For detailed terms and conditions, refer to the official Honeywell website or the provided warranty documentation.
11.2 Customer Support Options
Honeywell offers comprehensive customer support for the T6 Pro, including online resources, phone support, and the Honeywell Home app. Visit the official website for troubleshooting guides, FAQs, and downloadable manuals. For direct assistance, contact Honeywell’s customer service team via phone or email. Additionally, the Honeywell Home app provides in-app support features, ensuring help is always accessible when needed. These resources are designed to address any questions or issues promptly and effectively.
Conclusion
The Honeywell T6 Pro Installation Manual provides a detailed guide to successfully install, configure, and maintain your smart thermostat. By following the steps outlined, you can ensure optimal performance, energy efficiency, and seamless smart home integration. For further assistance, utilize the Honeywell Home app or contact customer support. Explore advanced features and refer back to this manual for future troubleshooting or updates, ensuring your T6 Pro continues to enhance your home comfort and energy savings effectively.